Filters in Custom Dashboard
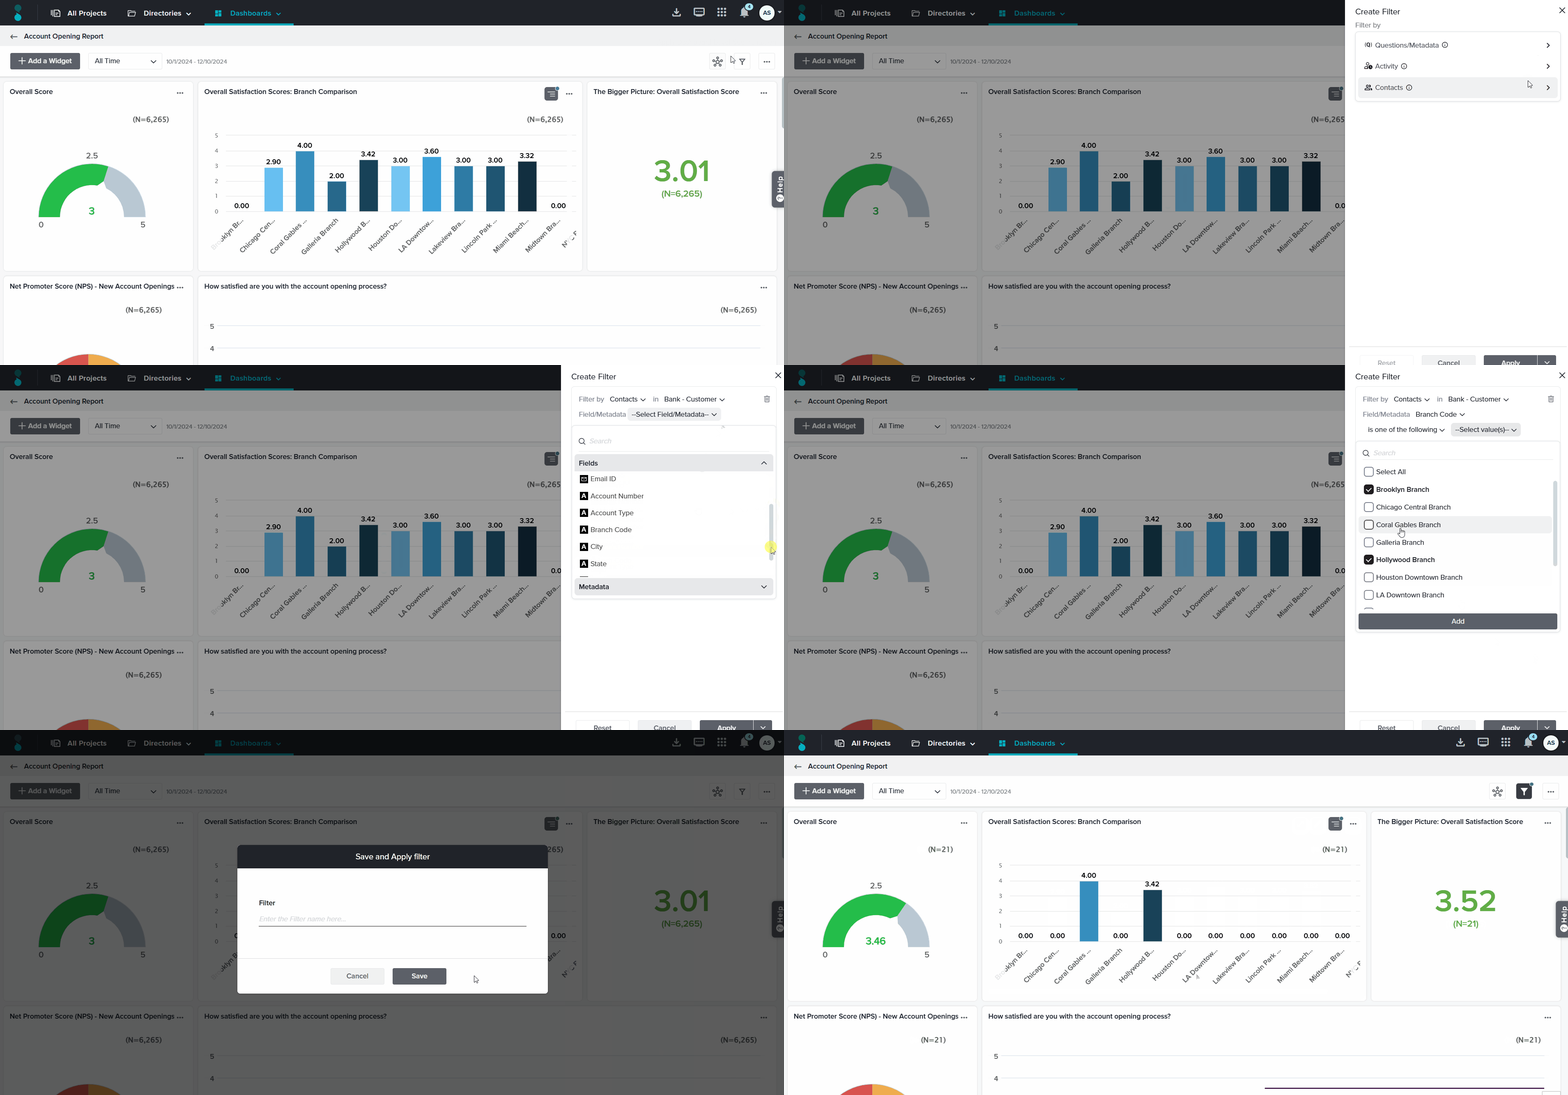
Custom Dashboards offer a comprehensive set of filters for precise data analysis. Currently, you can filter widget data based on three main categories:
- Activity: Filter data based on activities within Directories. Select a desired Directory from the dropdown, and then choose Attributes and Metadata to filter records. Metadata in this category includes Source of Contacts and Contacts imported by User ID.
- Contacts: Filter data based on contacts within Directories. Choose a Directory, and then select Fields and Metadata for record filtering. Metadata in this category includes Source of Contacts, Contacts imported by (User ID), and Link to Activity.
- Questions and Metadata: Filter data based on answer/metadata values. Metadata in this category includes Response Period, IP Address, Time to complete the survey, Language in which the survey was completed, and the Channel by which participants accessed the survey.
- Tags: This filter is available if you have at least one CX Project in your Dashboard. Filter data based on Tags under CX projects.
Metadata Functions in Activity and Contacts:
- Source of Contacts: Filter data based on the sources through which contacts were imported into the directory (e.g., file, SFTP).
- Contacts imported by User ID: Filter data based on User IDs that imported contacts within the directory, useful for accounts with multiple sub-users.
- Link to Activity: Filter data based on contacts linked to any activity in the directory.
How to Create a Filter?
- Access filters from the Filter option located next to the Segmentation in the top-right corner of the Dashboard. Alternatively, you can use the filter option available within the Widget Options for each widget.
- If you are accessing the filters for the first time, a modal displaying the available filter conditions will appear, allowing you to specify filter conditions.
- After defining the conditions, you can choose to either Apply the filter or Save and Apply it.

- If saved filters already exist and none are currently applied, accessing the filter option will display all saved filters upfront.

Hovering over any saved filter reveals options to Preview and Apply the filter. Additionally, a three-dot menu appears on hover, offering actions such as Edit, Duplicate, Rename, or Delete for the saved filter.
- Once a filter is applied, accessing the filter option opens a dropdown with options to Preview, Edit, or Remove the filter. You can also Create a new filter or open Saved filters from this menu.

- Reset the applied common filter for the entire dashboard by clicking the Reset icon next to the common filter. It’s important to note that this reset affects only the common filter across the entire dashboard, not individual widget filters.
The common filter located next to Segmentation applies to all widgets within the dashboard, whereas the filter accessed from an individual widget affects only that widget’s data.
Subscribe for tips and insights to drive better decisions!


